
Views: 0 Author: Site Editor Publish Time: 2026-11-13 Origin: Site


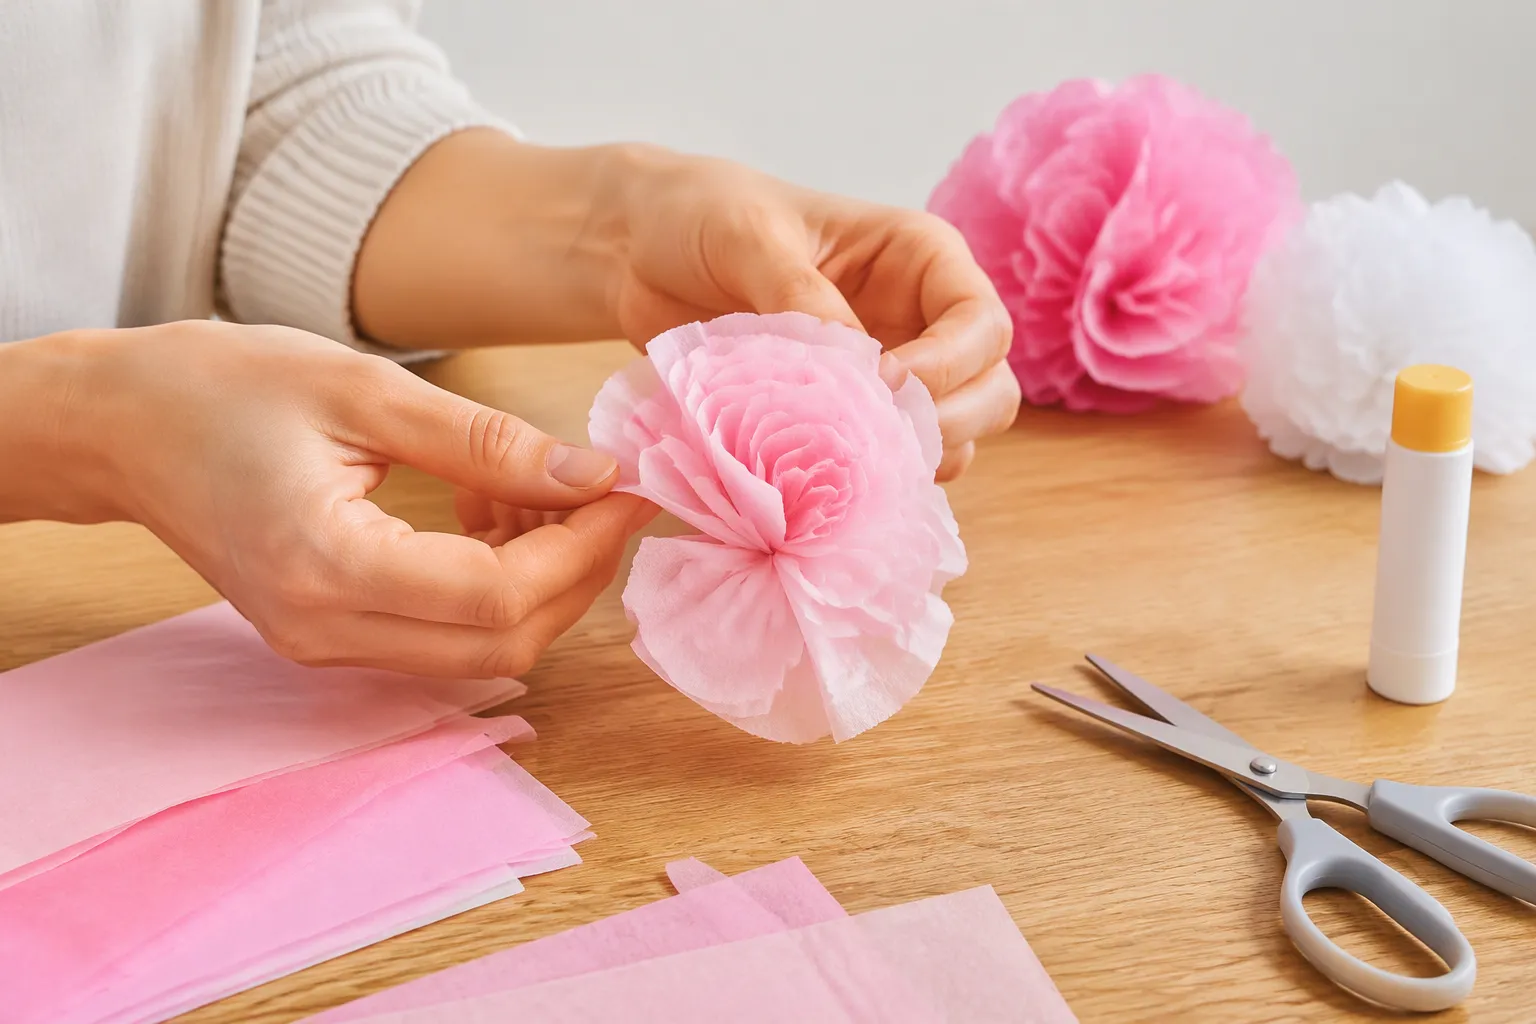
You can make a flower from paper tissue in just a few minutes. The whole process comes down to three simple actions: stack, fold, and fluff. That's it. You don't need special tools, and you don't need any experience. Kids can jump right in too. This is one of those easy tissue paper flowers projects that looks impressive but stays beginner-friendly. Once you learn how to make flower creations from tissue paper, you'll want to make flower after flower again and again. The best part? Easy tissue flowers start with supplies you probably already have at home. So let's gather your materials and get started.
You need only a few supplies: tissue paper, pipe cleaners or stapler, and scissors.
Stack 10-12 tissue layers, fold them accordion-style, and tie the middle.
Fluff the layers gently to turn the flat stack into a full flower.
Experiment with colors, sizes, and petal shapes to create different flower styles.
Use your flowers as decorations, gift toppers, or fun party crafts.
You need just a handful of items for this project. Grab white tissue paper, pipe cleaners or floral wire and thread, a glue gun, green colored paper, and scissors. That full set covers everything from the petals to the stem and leaves.
Pipe cleaners work well as stems because they bend and hold their shape. Floral wire gives you a stiffer stem for taller arrangements. Thread suits small, delicate blooms. The glue gun attaches leaves and secures the base. Green colored paper becomes the leaves and stem wrap. Scissors cut clean edges on your tissue paper flowers.
Every item here is inexpensive and easy to find at a craft store or online. Nothing on this list is hard to source. You can pick up the whole set in one trip.
Kids can start with an even shorter list. You only need scissors, a stapler, and tissue paper. That's the whole kit. This version skips the wire and glue entirely, so little hands stay safe and busy.
The stapler replaces the pipe cleaner as the center tie. You stack your layers, fold them, and staple the middle. Then you fluff the petals by hand. This method works best for small paper flowers that sit flat on a card or wall. The full supply set fits larger, stemmed flowers for vases and bouquets. Both options deliver lovely results, and each one has its own best use.
These supplies cost very little, and most households already own them. You can make easy tissue paper flowers today without a shopping trip. That low barrier makes this craft perfect for a rainy afternoon or a classroom activity.
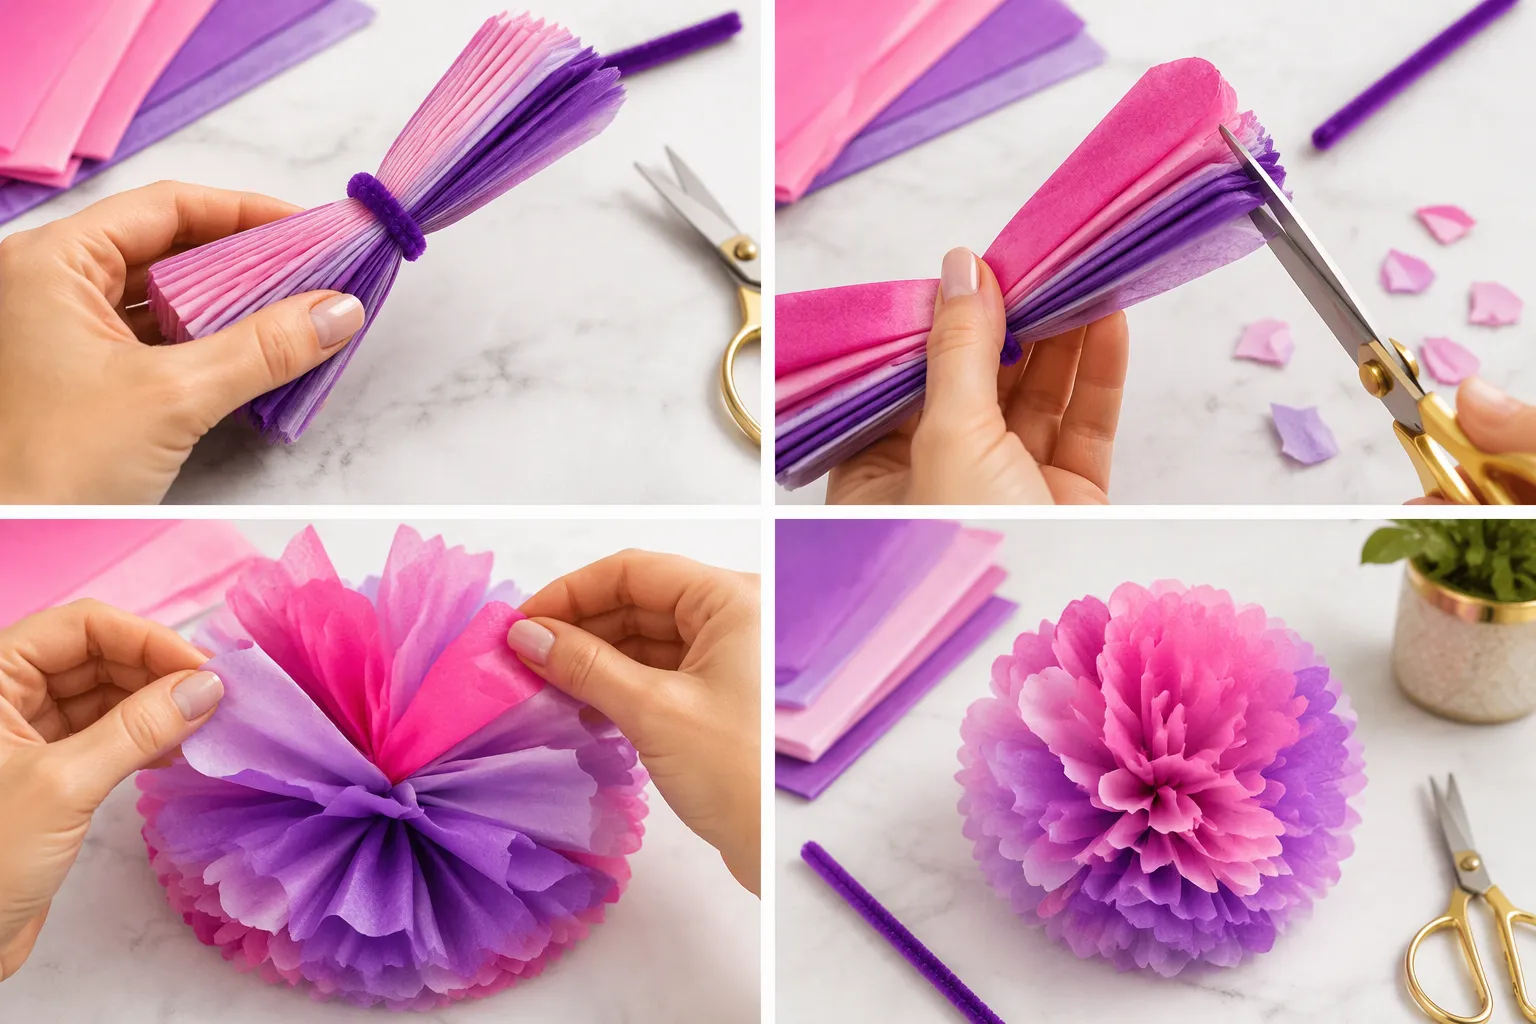
Start with 10 to 12 layers of tissue paper. Stack them neatly so the edges line up. Fewer layers give you a thin bloom. More layers give you a full, ruffled look. This is the foundation of every paper flower you will build.
Now comes the accordion fold. Grab the short edge of your stack and fold it over about ½ to 1 inch. Flip the stack and fold again in the opposite direction. Keep going, accordion-fold back and forth, until the whole stack looks like a paper fan. Press each crease firmly with your fingernail. Sharp creases make crisp petals later.
This folding step is where beginners often rush. Slow down here. A neat accordion fold the tissue paper evenly gives you symmetrical petals. A sloppy fold gives you lopsided blooms. Take the extra minute.
For the kid-friendly method, skip the fan fold. Stack green paper leaves on the bottom, then tissue paper petals, then a small center piece on top. Kids can staple this stack and fluff it right away. This layering approach works great for making flowers out of tissue paper with young crafters.
Measure to the center of your folded strip. Wrap a pipe cleaner, floral wire, or thread around that midpoint. Twist it tight. This tie becomes the heart of your flower and the stem if you use pipe cleaner or wire.
Next, shape the ends. You can notch them into points for sharp petals. You can round them with scissors for soft petals. You can trim them into fringe for a ruffled look. Each cut changes the final style. Try one shape per batch and compare.
Now fluff. Fan out the layers on each side of the tie. Pull them apart one at a time, gently. Start with the top layer and work outward. Squeeze and twist each layer upward toward the center. This is the moment your flat stack turns into a real bloom.
The fluffing stage is forgiving. If a petal tears, tuck it behind another layer. Nobody will notice. Keep adjusting until the flower looks full and round. You can curl outer petals down for an open rose shape. You can pinch inner petals up for a tight bud.
Once you learn how to make tissue paper flowers with this stack, fold, and fluff rhythm, the whole process takes just minutes. Each diy tissue paper flower you make gets faster than the last. Soon you will make tissue flowers without even thinking about the steps.
You can change the whole look of your paper flowers with a simple color swap. Try two shades of the same color for a soft gradient. Try a bold color with a white center for contrast. Mixing colors across layers gives each bloom depth.
Size is another easy lever. Cut your stack shorter for small buds. Cut it wider for big statement blooms. You can also vary the fold width to change how many pleats you get.
Petal shapes do the rest. Sharp notches read as daisies. Rounded cuts read as peonies. Fringed ends read as carnations. Make one batch in each shape and compare. This is the fun part of any diy tissue paper flower session, so experiment freely.
The tissue you choose shapes the final result. Gift-wrap tissue is thicker and holds a crisp crease. It suits large paper flowers that need structure, like wall backdrops or bouquet stems. Facial tissue is softer and thinner. It fluffs into delicate, cloud-like blooms that work well for gift toppers and table scatter.
Both types behave well in the same stack, fold, and fluff method. Gift-wrap tissue needs a firm press on each crease. Facial tissue needs a gentle hand during fluffing, since it tears more easily. Neither one is better overall. Each fits a different job.
Once you try both, you will know which tissue suits which style. That knowledge makes every easy diy tissue paper flower project faster. You can plan a whole batch of easy tissue paper flowers around one tissue type, or mix both in a single arrangement. Either way, your flowers will look intentional and polished.

Your finished blooms shine as decorations. Tape a few paper flowers to a wall for instant color. String them into a garland and drape it across a window. Set one on a shelf or a desk for a small pop of cheer. These paper flowers hold their shape well, so they stay pretty for weeks.
Gift toppers are another favorite use. Tie a tissue paper flower to a wrapped present instead of a bow. Glue a small bloom to a card for a handmade touch. You can also scatter tiny tissue flowers across a table setting for a party. Each one adds warmth that store-bought decor rarely matches.
This tissue paper flower craft fits any gathering. Set up a table with supplies and let guests build their own blooms. Kids love the stapler version, and adults enjoy the layered style. Everyone leaves with something they made.
Hosting a shower or a birthday? Make a batch of easy tissue paper flowers ahead of time. Use them as centerpieces, napkin rings, or photo backdrop pieces. A group session turns a simple diy into a shared memory. You can even run a friendly contest for the most creative petal shape.
The fun and easy diy tissue paper flower craft works for classrooms too. Teachers can plan a short session with minimal cleanup. Students practice folding, cutting, and shaping. They take home flowers out of tissue paper they made themselves. That pride lasts longer than the craft itself.
Once you try one easy diy tissue paper flowers project with friends, you will want to plan another. The supplies stay cheap, and the steps stay simple. A tray of tissue flowers brightens any room and any mood.
Making flowers from tissue paper takes minutes, costs almost nothing, and forgives every mistake. Tear a petal? Tuck it away. You can practice freely until your paper flowers look right.
Pick one variation and run with it. Swap colors, cut bigger petals, or try a new size. Each attempt teaches you something new about paper flowers.
Gather friends or kids and build a batch together. A tray of easy tissue paper flowers turns any afternoon into a party. You will soon make flower after flower. Make flower gifts, too.
We would love to see your paper flowers. Share a photo of your tissue paper flower and tag us. Happy crafting!
Most people finish a single bloom in a few minutes. The folding takes the longest at first. Once you get the rhythm down, you can make several paper flowers in one sitting without much effort.
Yes, with the simple version. Swap the wire and glue gun for a stapler. Kids can stack, fold, and fluff on their own. You may need to help with the stapling at first. After that, they can make flowers independently.
Don't worry. Tuck the torn layer behind a clean one. The damage hides inside the bloom. This craft forgives mistakes, so you can keep practicing how to make tissue paper flowers without wasting supplies.
Keep them in a box with room to breathe. Don't stack heavy items on top. A light dusting keeps them fresh. Stored this way, your paper flowers stay pretty for weeks, and you can reuse them for another event.
You can, but the result changes. Thicker paper holds crisp shapes but fluffs less. Tissue stays soft and cloud-like. For the classic look, stick with tissue. For structured paper flowers, try a heavier stock and expect a different feel.